The Little Yellow Digger Truck cake topper tutorial - #BAKEATIP
Well I think it's about time I update this blog!
It's been in my "list to do" since early this year...but I just couldn't find the time to do it.
I am truly truly sorry...if only you could see my face right now I am doing a sad face with a frowning mouth and disappointed eyes emoji ....
To make up for my absence...here is a simple tutorial of how to make a yellow truck digger!
Materials:
- Yellow fondant (I used Satin Ice brand)
- Black fondant
- Silver edible paint
- White gel food colour (to paint the truck's windows) or white fondant
Tools:
- Wilton tip 2D or borrow your kid's lego piece (small wheel rim)
- Small sharp knife
- Paint brush and water for glue
- Small paint brush
- Mini circle cutters
- Small straw
- Dry spaghetti sticks
 |
| Wilton tip 2D |
Cut approx 2x2cm and 2x1cm diameter using mini circle cutter.
I borrowed and used my kid's lego piece to create the wheels rim,
but you can also use Wilton 2D tip to create similar look. Then I used a ruler to create some indentation on the outer wheels. For the 2 smaller wheels, I used a straw to create the centre line.
Set aside to dry then paint the rim with edible silver food colour.
Truck's body measurement: approx 4cm x 2.5cm


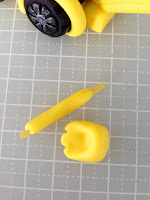
Main crane's measurement approx 4cm length.
In here I have used dry spaghetti sticks for support because I didn't have enough time to let this completely dry, if you have time to let this dry..you won't need the support sticks.


To finish it, you can paint the truck's window using white gel food colour (see main cake photo above), however if you are not confident using the brush to paint you can also use white fondant. Thinly roll white fondant and cut few rectangle shape to make the window. Attach these to the trucks.
I hope you have enjoyed this simple tutorial and happy caking!


Comments
Post a Comment